Encased Bamboo Fitting Guide
Encased Bamboo® Installation Guide
“If You Fail to Plan, You Are Planning to Fail” — Benjamin Franklin
Subfloor. Make sure the subfloor is flat, level, clean and free of debris. New
concrete must be cured for at least 60 days. Test the subfloor moisture
prior to installation.
Acclimatise. Your Bamboo Flooring For 5 Days. Acclimatise your floor as
close to the installation area as possible, for 5 days in normal living
conditions
Expansion. Leave at least 10-12 mm expansion spaces between flooring
and ALL vertical objects (walls, cabinets, pipes, etc.) Large flooring runs
may require additional expansion joints. Use transition mouldings
between rooms and doorways 3 feet or less. Undercut door jambs and
casings to provide adequate expansion space. Do not screw or nail
cabinetry or other permanent fixtures to a floating floor.
Bamboo Family Encased Bamboo® Flooring Installation / Prepare Job Site,
Acclimation, Control Subfloor Moisture, Environmental Conditions
Instructions.
Proper installation and maintenance are key elements in achieving best
flooring results. It is the responsibility of the installer/owner to follow all
guidelines provided by Bamboo Family for success.
Please read through this document completely.
Important Pre-Installation Notes
Note: Flooring not used for its intended purpose will not be covered under
warranty.
The following information provided by Bamboo Family is intended to serve as a
reference guide only. Please carefully read Bamboo Family’s installation,
maintenance and warranty documentation on our website prior to installation.
Bamboo Family offers in house technical support as a courtesy to our
customers. Consult with one of our Bamboo Family flooring experts to find
answers to your specific installation questions unique to your application.
Contact us by email: sales@bamboofamily.co.uk
Upon ordering your bamboo floor consider adding an additional 10% to allow
for cutting waste and grading allowance.
Installer/Owner assumes all responsibility to inspect all flooring before
installation. Boards deemed unacceptable in appearance can be placed inclosets, near walls or simply not be used. Pieces with glaring defects that can be
seen from a standing position should be cut off or not be used as use
constitutes acceptance. The use of putty, filler sticks or markers to touch-up
flooring during installation is considered normal practice.
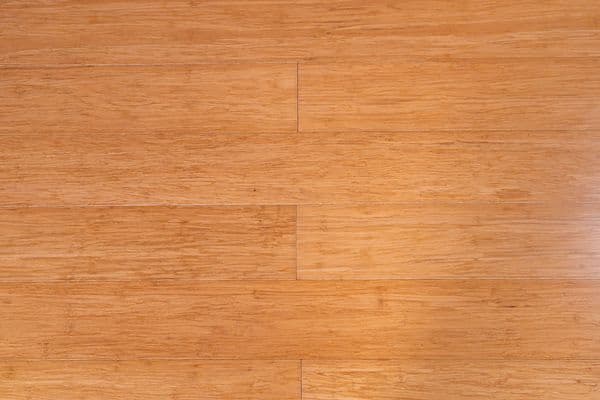
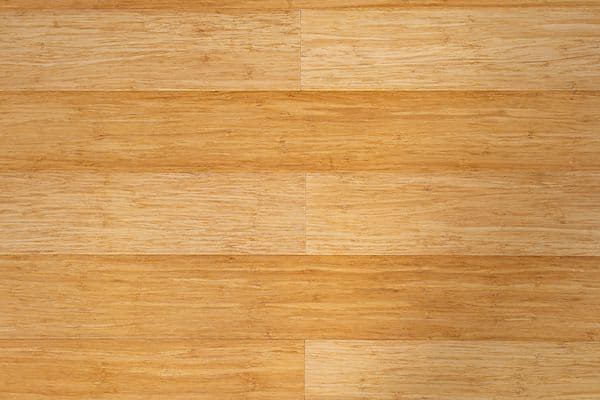
As bamboo is a natural product, natural variations in colour may occur within
and between individual flooring planks. To visualise the range of colours within
the flooring style you are considering, compare your samples to the photos on
our web site. During installation, work from several cartons at a time to achieve
a uniform appearance across the entire floor. Mix and mingle planks when dry
laying the floor for maximum aesthetic appearance. Blend mouldings to planks
that have similar colour. Natural variations in colour are not covered under
warranty.
It is the responsibility of the installer/homeowner to determine if the job site
conditions; environmental conditions and sub-floor are acceptable for the
installation of Bamboo Family flooring.
Bamboo Family makes no warranty or guarantee of the quality of the chosen
installer’s work or of a particular installation performed by him or her. Bamboo
Family disclaims all liability for any errors or improprieties in the installation of
its products by an installer.
Floor noise is normal and will vary from one installation type to the next.
Occasional noise is due to structural movement and may relate to sub-floor
type, flatness, deflection, and/or related to the fasteners, changes in
environmental conditions, relative humidity and the amount of topside pressure
applied to the flooring. For these reasons floor noise is not considered a product
or manufacturer defect.
Prior to Installation of Bamboo Family FlooringTM Job Site Preparation
Prior to installation, it is the installer’s responsibility to determine that the
jobsite, environment and subfloor conditions. Do not deliver flooring to jobsite
until the building has been enclosed with windows and doors, all cement,
plastering, and other “wet” work has been completed, and a consistent room
temperature has been reached. Confirm proper drainage exists around the
structure. Lack of moisture protection can allow excessive water or moisture to
penetrate basement walls, flow beneath concrete slabs, basement floors, and
into crawl spaces.
Subfloor Requirements
General: Subfloor must be structurally sound. All subfloors must be flat to a
tolerance of 4.5 mm in a 3 mtr radius. Use appropriate levelling products for
correcting subfloor deficiencies. Subfloor surfaces must be smooth, clean, dry
and free of contaminants that would interfere with any adhesive bond. All
subfloors should be tested for moisture content. If high moisture readings are
found, identify the moisture source and correct the problem before installation.
Do not install flooring directly over floor joist without proper subflooring.
Acceptable Subfloor Thickness Requirements:
Concrete Subfloors: Subfloor must meet all above requirements. Concrete must
be fully cured and at least 60 days old. Concrete must be free of dirt, oil, paint,
old adhesive, wax, sealers and curing agents. Concrete that is not properly
levelled can cause hollow spots, and squeaks. Sand or grind down high spots.
Level low spots with appropriate levelling material; allow extra drying time for
the levelling compounds. Test subfloor moisture content.
Moisture Testing Subfloor
General: Test the subfloor for moisture content before installation. If high
moisture readings are found, identify the moisture source and correct the
problem. Extend acclimation time and increase ventilation until the proper
conditions have been met. Apply a moisture barrier. Please note that test results
are only applicable the day of testing and will not ensure that moisture will not
fluctuate with seasonal changes. Regardless of subfloor moisture content.
Bamboo Family do not warrant against moisture related problems. If results
show moisture vapor at or exceeding 12%, determine its source and correct
problem before installation.
Wood Subfloors: Wood Subfloors: Use moisture meter to test wood subfloor
moisture content. If results show moisture vapor at or exceeding 12%,
determine its source and correct problem.
Concrete Subfloors: Concrete subfloors must be tested for moisture vapor pressure in more than one place for consistent readings. Use a Digital Hygrometer. It should be left in place for at least 24 hours. The maximum reading should be 65% RH (Relative Humidity).If test results show moisture vapor exceeds the minimum requirements below, do not install the floor without an impermeable vapour retarder with a perm rating of less than .13 designed to permanently block this moisture.
Radiant Heat Systems
It is the responsibility of the installer to ensure that the recommended
environmental conditions are met for installation. Refer to your radiant heatsystem manufacturer to determine its compatibility with bamboo flooring, and
to learn the specific requirements for installation.
Because of the wide variety of systems on the market (Hydronic, embedded in
concrete, electrical wire/coil, heating film/mat) each with its own features and
applications it is recommended that the user consult with the radiant heating
provider for best practices, installation methods and proper subfloors.
Typically, the floating installation method is the most suitable for use with
radiant heat systems. Radiant heat system must be turned on and in operation
for at least 6 days before installation.
The flooring must be acclimated per Bamboo Family’s acclimation instruction
over the radiant heat with the system turned on throughout the acclimation
timeframe.
The system must be turned down to 15c and maintained 24 hours prior to
installation.
Once install is complete, turn system back on and slowly bring back up to
normal operating temperature over a period 4-5 days at 5c per day.
Floor should never be heated over 27°C. Consult with your radiant heating
system manufacturer to successfully limit the maximum temperature.
Always remember that rugs placed over radiant heated flooring can increase the
surface temperature in that area by 2°- 4°C degrees.
When turning off the radiant heat system it must be turned down slowly at a
rate of 5°C degrees per day. You should never just turn the system off.
Installation of Bamboo Family FlooringTM General Guidelines - All Installation
Types
Follow Bamboo Family Maintenance & Care Guidelines to keep your floor
looking its best after installation
Save extra flooring for future repairs.
Do not install flooring under permanent or fixed cabinetry.
Floor should be installed from several cartons at the same time to ensure good
colour, shade and appearance.
Since bamboo expands with any increase in moisture content, we require
leaving at least 10-12 mm expansion space between flooring and all walls and
vertical objects, such as walls, cabinets, pipes, etc. If the installation flows into
other rooms and continuous runs in excess of 12 mtrs, a greater expansion isrequired, approximately 2mm for every 3 mtrs. Failure to follow this guideline
may result in twisted or buckled floors.
During installation, it is the installer’s responsibility to document all jobsite
conditions and measurements including the installation date, flooring moisture
content, site relative humidity, temperature, and subfloor moisture content. This
information must be retained by the installer and left with the property owner
as a permanent record.
Depending on the application, Bamboo Family flooring can be installed over an
approved underlayment to provide greater thermal insulation and sound
isolation qualities. Bamboo Family recommends using our underlay’s see shop
for details which offers several benefits that include step noise reduction.
Expansion Space Is Required
Since bamboo expands with any increase in moisture content, we require
leaving at least 10-12 mm expansion space between flooring and all vertical
objects (walls, cabinets, pipes, etc.). If the installation area exceeds 12 mtr, a
greater expansion space is required; approximately 2 mm for every additional 3
mtrs . If the floating installation flows into other rooms, a T-moulding must be
used in doorways and openings between rooms (halls, archways, etc.) to allow
separate areas to move without interference. See our shop for a full range of
matching accessories.
Note that proper expansion space depends not only on the size and flow of the
installation, but also on expected seasonal changes in temperature and humidity
that may cause the flooring to gain or lose moisture content over time. For
example, if an installation takes place when humidity conditions are low, it’s
likely that the wood flooring will gain moisture and expand later during humid
seasons. In those cases, incorporate additional expansion space through use of
spacers or transition mouldings.
Bamboo floors must be able to expand/contract without interference. Failure to
follow this guideline may result in separation or buckled floors. Do not install
cabinets or other permanent fixtures on top of the floor. Never nail or screw
anything through a FLOATED floor.
Undercut door casings and jambs. Remove any existing doorway thresholds.
These items can be replaced after installation. When undercutting door casings,
the installer should confirm there is the recommended expansion space. The
floor must have 2 mm clearance under the door casing to be able to float freelywithout vertical restriction. The installer should ensure that the plank can move
freely under the door jamb.
Floating Click-Lock Glueless Installation Method
Recommended Floating Click Tools
• Underlayment • Hammer
• Tapping block (trimmed piece of flooring)
• Tape measure • Wood or plastic spacers (12 mm) • Pencil
• Flat bar or pull bar
• Chop-Saw
• Earplugs & safety glasses
Installation of Bamboo Family FlooringTM
1. Before you start, ensure that the job site, subfloor and environmental
conditions are acceptable for installation of Bamboo Family flooring. All
requirements specified in Bamboo Family’s Installation Guidelines must be met.
2. For unlimited moisture protection on concrete applications, seal concrete
subfloor prior to installation.
3. Allow at least a 10-12 mm space for expansion around the perimeter of the
room and all vertical objects using spacers. Also see section: “Expansion Space is
Required”.
4. It is recommended to install the planks parallel to the longest wall.
5 . Click a few rows together before full installation to confirm your layout plan.
6. Begin by laying the first plank in a corner with the long grooved side toward
the long wall.
7. Connect short side of second plank together with mating side of the first
plank.
8. Cut the last plank and complete the row. Use the remaining plank to start the
second row.
9. Make sure to offset the end joints of consecutive rows by a minimum of 15 cm
for best appearance.
10. Begin the second row by clicking the long edge of the planks together.11. Begin at an angle and press the plank downward to fully engage the click
lock system.
12. Repeat this process for the second plank with the short end of the plank
covering the mating end of the previous plank. Use a hammer and tapping block
to ensure proper engagement.
13. Repeat this process for remaining rows keeping 15 cm between joints and
maintaining a 10-12 mm expansion gap around fixed objects.
14.The last row may require rip cutting the planks to size, be sure to cut enough
to maintain proper expansion gap. 15. As with the other rows, complete the last
row by connecting the long edges.
After Installation
The newly installed floor is complete and can be walked on immediately
Glue-Down Installation Method
Recommended Glue-Down Floor Tools
• Flooring adhesive: Zero-VOC Adhesive
• Adhesive trowel as recommended by adhesive manufacturer • Tapping block
(trimmed piece of flooring)
• Wood or plastic spacers (12 mm)
• Flat bar or pull bar
• Chop-Saw
• Undercut or jamb saw • Hammer • Tape measure
• Carpenter square
• Earplugs and safety glasses
Glue-Down Installation Steps
Before you start, ensure that the job site, subfloor and environmental conditions
are acceptable for installation of Bamboo Family flooring. All requirements
specified in Bamboo Family’s Installation Guidelines must be met.
1, Seal concrete subfloor prior to installation.
2, Allow at least a 10-12 mm space for expansion around the perimeter of the
room and all vertical objects using spacers. Also see section: “Expansion Space is
Required”.
3, Dry-lay a couple rows before starting installation to confirm your layout plan.4, Begin installation next to an outside wall. This is the best reference for
establishing a straight working line.
5, La y the first row of flooring with groove facing the wall. Starter rows should
be secured by blind nailing and gluing.
6, Connect short side of second plank together with mating side of the first
plank.
7, Cut last plank and complete row. Use the remaining plank to start second row.
8, Offset end joints of consecutive rows by a minimum of 15 cm for best
appearance.
9, With the first row in place, trowel out some adhesive and lay second row by
connecting short edges of planks first. Use a pull bar to tap long edges together.
10, Always check your working lines to be sure the floor is still aligned.
11, Use tapping block to fit planks together, but be careful not to let installed
floor move on the wet adhesive while you are working.
12, The last row may require rip cutting the planks to size.
13, Flooring planks on perimeter of room may require weight on them until
adhesive cures enough to hold them down.
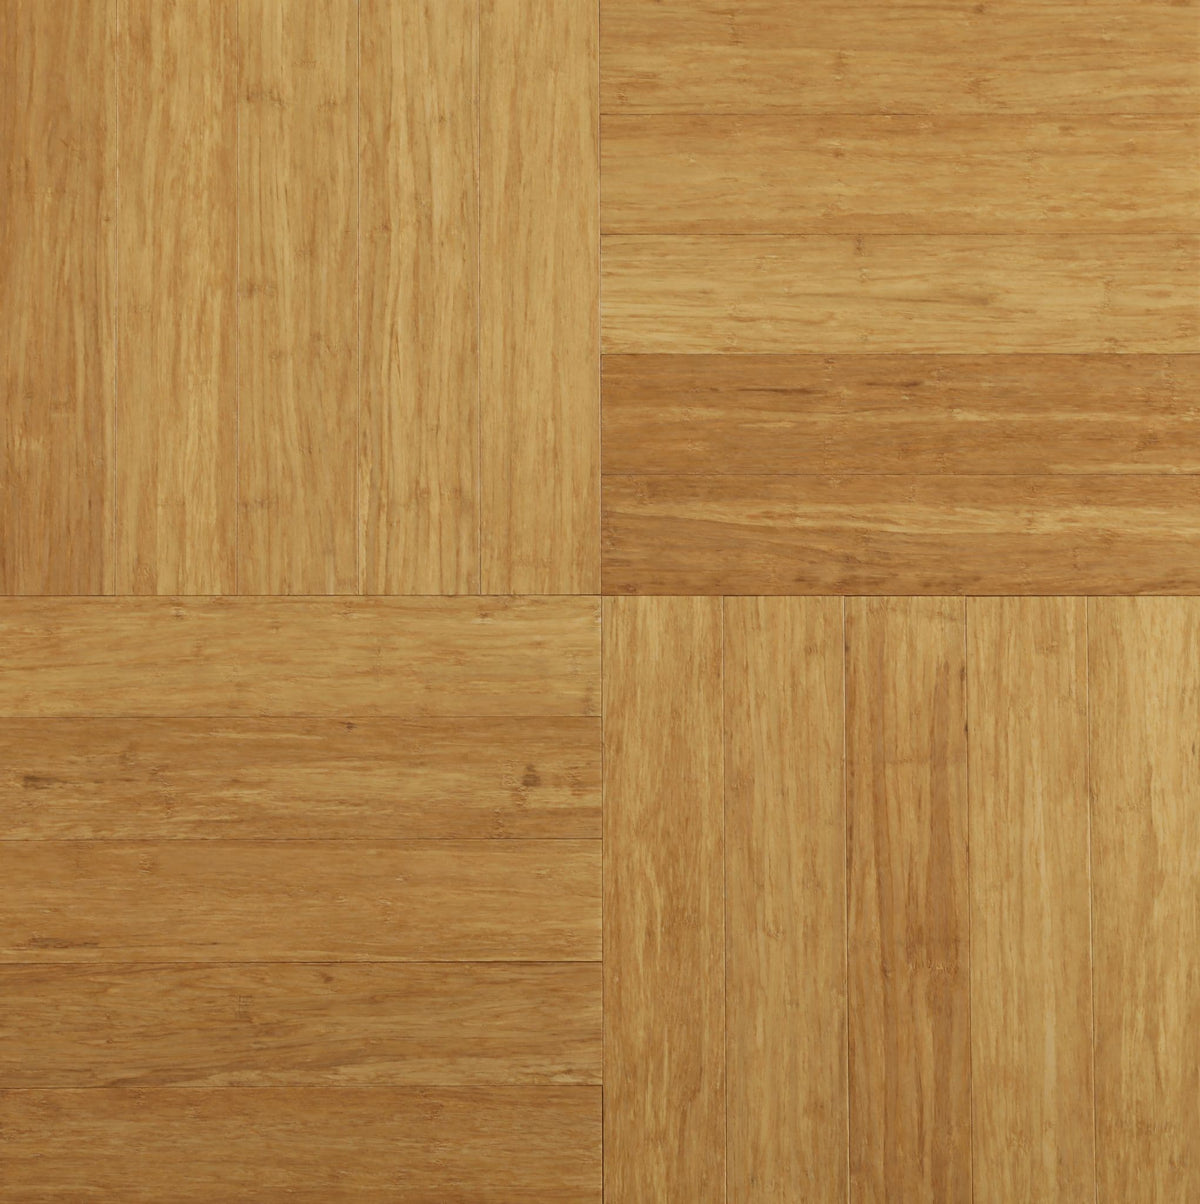
Glue-down Herringbone flooring installa4on steps.
There are many ways to install a herringbone flooring, make decision to
the pattern best for the room and your interest.
Below are some different patterns for reference

1, The first and most important step, to locate the central line. Measure the
room correctly, find the centre of the space based on the way you want to install
the flooring, then use chalk lines to mark it out clearly on the subfloor. You will
be aligning the first row of flooring to this line.2, once the central line is marked, apply adhesive to the subfloor along the line,
then set the first row loosely, double check it is in the center of the room, can
use tapping block or hammer to adjust while the adhesive is still wet. Once
confirm, press down the first row hardly to the subfloor, remove excess
adhesive then allow it to fully dry.
3, once the first row is completely set, begin the second row from the end of the
first row. Continue with the pattern you like until the whole floor is installed
accordingly. When it gets close to the wall, measure the distance, mark and cut
the planks that extend to the walls, 12 mm expansion gap is also required.
4, after the installation is finished, keep foot traffic off the floor for a minimum of
48 hours. Then remove all the spacers and install the beading or skirting.
After Installation
Always remove any adhesive from the surface of the flooring (smudges,
fingerprints, etc.) before it dries.
Allow the newly installed floor to fully cure based on adhesive recommendations
before walking or moving furniture onto the floor.
Encased Bamboo® Care & Maintenance Guidelines
Bamboo Family flooring is treated with our unique scratch resistant coating, and
its strength surpasses almost any other flooring in the world. Bamboo Family
flooring is tough, but all hardwood flooring is pervious to dents, scratches,
discolouration or other natural or man-made damage. Prevention is a big part of
the care for bamboo floors.
Bamboo Family recommends you vacuum or sweep the floor on a regular basis
or as needed to remove dirt, sand or grit. Do not use rotary brushes on the floor
as this may cause scratches.
Soak up spills immediately using a dry towel or dry mop.
For general cleaning, use a hardwood floor cleaner & hardwood floor mop.
Fit furniture legs with felt tips or protective caps. Fix rolling furniture with soft
rubber casters. pick up heavy furniture or appliances; do not slide.
Keep pets nails trimmed to avoid excess scratching.Limit direct sunlight on floor by using curtains and blinds in areas that are
exposed to high UV rays.
Maintain relative humidity between 40%-60%.
Never wet-mop a bamboo floor. Standing water may cause permanent damage.
Never use any of the following products on your floor: ammonia-based cleaners,
acrylic finishes, wax-based products, detergents, bleach, polishes, oil soap,
abrasive cleaning soaps, or acidic materials such as vinegar. Never apply wax
treatments to your floor.
Use interior and exterior doormats at entrances to prevent dirt and moisture
from being tracked onto the floor. Area rugs are also recommended in front of
kitchen sinks and in high traffic areas. Do not use rugs with solid rubber or vinyl
backings. Rugs must be made of a breathable material to prevent moisture
entrapment. We recommend using a breathable rug underlay. Mesh or grid
patterns are best.
What is the best way to mop my Encased Bamboo® floor?
Never wet (or damp) mop your floor. Standing water can damage the floor. You
may periodically use a very slightly dampened (near dry) mop to spot-clean;
however excessive moisture will dull the finish. For bamboo flooring in the
kitchen, place an area rug in front of the kitchen sink.
How can I protect the finish of my Encased bamboo® floor from wear over time?
Sweep and vacuum your floor regularly using a broom or dust mop. Brush or
felt vacuum heads are recommended as opposed to vacuums with beater bars
or hard heads. Do not use rotary brushes on the floor as this may cause
scratches. Use throw rugs both inside and outside doorways to prevent debris
from being tracked onto floors. Keep pet’s claws trimmed to avoid excess
scratches. Avoid contact with excess moisture. Avoid walking on your floors with
cleats, sports shoes and high heels. Do not slide heavy furniture or appliances
across the floor.
How do I fix a scratch on my finish?
If the scratch is white, the finish has not been compromised and is repairable.
Simply using a flooring cleaner, should eliminate these blemishes. If the scratch
is deeper but the raw wood is not exposed, light buffing with a white polishing
pad can shine up the dull area. Often the damage becomes less obvious. Whenremoving stains from any wood floor, always begin at the outer edge of the stain
and work toward the middle.
My wood floor was damaged through the finish. Can it be repaired?
If you have a minor chip or slight damage, this may be minimized with a
coloured wax. If the damage is severe enough, board replacement is typically
the best option.
Can I refinish my Encased Bamboo® Flooring?
Major modifications are not recommended and are never a guaranteed solution;
all repairs are unique. Excessive sanding is not covered under warranty.
Nevertheless, the method of refinishing Bamboo Family Flooring is the same as
any hardwood flooring.
Can I put heavy furniture on floated flooring?
Heavy furniture (220 kg) may obstruct the free, natural movement of a floated
floor. Restricting this movement in certain areas can lead to problems such as
buckling or separation when the floor experiences natural expansion and/or
contraction.
Never fit fixed units or carpentry over the floor as it must be able to move contract and expand freely failure to do this may cause gaps and buckling. This may lead to long term damage resulting in needing a new floor, his includes fitted kitchens. For further information please contact us on sales@bamboofamily.co.uk
Occasional Flooring Noise
Floor noise is normal and will vary from one installation type to the next.
Occasional noise is due to structural movement and may relate to sub-floor
type, flatness, deflection, and/or related to the fasteners, changes in
environmental conditions, relative humidity and the amount of topside pressure
applied to the flooring. For these reasons floor noise is not considered a product
or manufacturer defect.